Thursday 26 July 2012

Frangipane and Fig Jam Tartlets

As the end of winter approaches and spring is beginning – so does the time for baking (at least in my house).

Following on from the delicious Fig Jam I made in March (see the Fig-tastic post), I decided to do a bit of early spring cleaning of my pantry; aka finding an excuse to bake delicious things (not that one ever really needs an excuse).

Using a Jamie Oliver recipe that a dear friend has adapted (thank you so much darling!) I made Frangipane and Fig Jam Tartlets. You could easily substitue any other high quality homemade jam/jelly.

Ingredients

  • 6 small shortcrust pastry cases (pre-bought is fine)
  • 1 large egg
  • 100g almond meal
  • 100g softened butter
  • 90g caster sugar
  • ½ orange, zested
  • 1 tablespoon vanilla bean paste (can substitute with essence)
  • 170g good-quality fig jam

Method

  1. Preheat oven to 190 degrees Celsius (I have a fan forced oven) 
  2. Put the 6 pastry cases on a baking tray (lined with foil or wax paper)
  3. To make the frangipane mixture - crack the egg into a mixing bowl and add the almond meal,  butter and caster sugar.
  4. Grate over the zest of ½ an orange and add the vanilla bean paste
  5. Mix together until combined
  6. Spoon  2 teaspoons of jam into each pastry base
  7. Top off with frangipane mixture (you can add a drop of jam on top to caramelize if desired)
  8. Bake for 15 to18 minutes, until top of tartlets are light golden brown.

Notes

Ensure your oven is hot enough and has a consistent temperature (essential for baking) so that your tarts cook properly and within the suggested time frame (an in-oven thermometer is a great help for this).

If the tartlets don’t turn a light golden brown within 18min, you can continue to cook until 25min.
Don't be concerned if while cooling the center of the tartlets sinks - this is normal.

They will keep for up to five days in a closed container.

Serve warm or chilled - delicious anytime, anywhere.

Lush

Thursday 19 July 2012

Di Bella Baby!

What: Di Bella Coffee

Where: 19-21 Leveson Street North Melbourne VIC 3051

Another amazing coffee and breakfast place – and just a quick walk from Vic Markets.The perfect place to have breakfast (or brunch in my case) before you go shopping for those local fresh ingredients.

The menu is full of delicious staples and breakfast classics. Get there early though – as it is a busy hot-spot for the locals – especially on the weekends.

Breakfast:

2 Poached eggs on Sourdough with my choice of sides
  • Roasted Tomatoes
  • Marinated Feta
  • Smoked Bacon
  • Sauteed Mushrooms
And of course – COFFEE, COFFEE & COFFEE

Review:

I say you can always judge a place by how they do their eggs – and these are some of the best in Melbourne.

Lush

Di Bella Coffee Roasting Warehouse on Urbanspoon

Tuesday 17 July 2012

Ice-cream Cookie Cups

Nothing better than turning on the heater to max, and eating ice-cream and cookies (even if it is winter). And what better way to enjoy both classic desserts than together.

YES – A cookie made into an ice-cream cup.

This recipe is inspired by the Family Fun Recipe and a friend of mine who made them for dinner one night when I was a guest.

Ingredients

  • 1/2 cup butter 
  • 2/3 cup sugar 
  • 1 egg
  • 1/2 teaspoon vanilla extract
  • 1/2 teaspoon salt
  • 1/4 teaspoon baking powder
  • 1 1/2 cups flour
  • 1/4 cup miniature semisweet chocolate chips

Cookie Dough Method

  1. Mix the butter, and sugar in a large bowl (electric mixer is best)
  2. Add egg and vanilla extract, mix until combined.
  3. Sift in the salt, baking powder, and flour while mixing.
  4. Stir in the chocolate chips.
  5. Half mix, shape into two flat discs, and wrap it in plastic. (Chill the dough in the refrigerator for at least 2 hours)

Cookie Cup Method

  1. Heat the oven to 180 degree Celsius.
  2. Using two 12 cup muffin tins – turn them upside down, and use the bottom side to shape cups.
  3. Cover only half the bottoms with squares of aluminium foil (use every other cup so there's some space between them).
  4. Grease the foil with a bit of butter
  5. Unwrap 1 disk of dough, place it between 2 sheets of baking paper, and roll it out to a 1/3 cm thickness.
  6. Cut out 10 cm diameter circles of dough and place each one over a cup bottom, smoothing out any cracks (do not push out or make them thinner).
  7. Repeat with the other disk, rerolling and reusing any scraps.
  8. Bake the cookie cups for 10 to 12 minutes or until light brown.
  9. Let them cool for 10 minutes, and then remove the foil and cookies together from the muffin pan.
  10. Peel off the foil and let the cups cool completely on a rack.

Makes 10 cups.

Then simply fill each cookie cup with a scoop of ice cream and enjoy!

Notes

I know what you are thinking – because I thought it too.
“All this rolling, refrigerating the dough – I could so just wing it instead”


Well – I wouldn’t – I tried to take shortcuts the first time and it was a disaster – I ended up with an upside down mass of cookie dough – not a single cup.

However – if this happens to you, you can salvage it in a way.
  1. While the dough is still hot, gather it all and push into the bottom of a round cake tin.
  2. Then when this cools, you have the perfect base for a free-form ice-cream cake
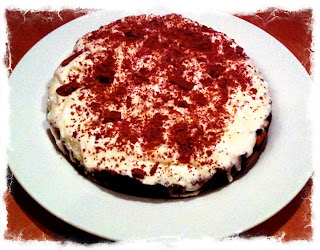
  3. To make – simply top with ice-cream, sprinkle with chocolate flake and re-freeze (see the picture below of mine)

Lush