Showing posts with label Baking. Show all posts

Monday, 3 February 2014

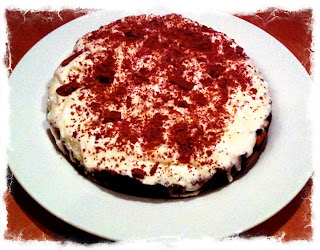
25 minute Ice Cream Layer Cake

In an attempt to save space, money and trees I have cancelled my food magazine subscriptions and gone through my 5 (!!) years of magazine - tearing out recipes I liked. As a result, I have nothing lightweight to flick through on our endless hot summer nights. Giving into temptation, I bought my first ever Taste magazine. Full of quick, easy hot weather meals this may become a regular purchase.

This isn't an advert for Taste, so I won't wax lyrical, except to give them credit for this recipe. It's so simple and it only takes 25 minutes. Although not the cheapest option, if you ever need a quick, cooling dessert that can be instantly made larger or smaller this is the one for you. As always I have a few changes and tips that are strongly recommended. 


  • Assume 1/2 ice cream sandwich per person for a normal sized slice
  • Swap the cream for ice cream to avoid that icy texture if you over freeze it
  • Make room in your freeze before starting this!
  • Swap the chocolate sauce for a pre-made one or even just melted chocolate
  • If the cream is too frozen, use the chocolate sauce to stick the toppings on
  • For extra minty-ness, add some peppermint essence to the cream once whipped
Mint Ice Cream Sandwich Cake
Serves 4-5

Ingredients

Cake:
  • 2x 4 pack of Cadbury Ice Cream Sandwiches 
  • 300ml cream, whipped to soft peaks
  • 1 pack Aero Baubles, sliced thinly length ways (into shards)
  • 2 pack Mint Crisp, cut in half
A version of Nigella's Chocolate Sauce:
  • 75g dark chocolate
  • 125ml double cream
  • 2tsp of instant espresso powder dissolved in 2tbsp water
  • 1 tbsp golden syrup

Method
  1. On a flat serving plate arrange 4 of the ice cream sandwiches
  2. Cover the top with a layer of cream about 0.5cm thick
  3. Sprinkle half the mint crisp shards on top
  4. Place the remaining ice cream sandwiches on top
  5. Top with cream and freeze for 20mins
  6. Scatter with the top with Aeros and mint crisp
  7. Drizzle the hot chocolate sauce over the top, slice and serve 
Enjoy!

Glutton

Friday, 31 January 2014

Meringue Layer Cake

We're almost one month in to 2014 and Lush and I really should have a resolution to make this a dedicated blogging year. Working in our favour is that I now have access to my own kitchen. Not that I didn't have a kitchen before, but now there is no one else to get annoyed by the mess I leave behind. Working against us is our natural ability to be consumed by the cooking and the eating and forget about the photographing and writing! Wish us luck; we will need it!

Using this kitchen freedom, I have been making an effort to cook regularly and have started hosting dinner parties again! A dinner party with friends usually involves a rich, chocolate brownie or a pudding that smells good enough to overpower the lack of any attempt (or success) at decoration and presentation. But no more!


This is my attempt a meringue layer cake that to be honest was more of a learning experience than a success. Things to remember with meringue:
  • Don't make it on a humid day (you'll notice mine is quite flat)
  • Make sure to beat your eggs well to get as much air as possible
  • Assemble the cake no more than 30 minutes before you eat it. The creme patisserie will make the meringue soft and you don't want to lose the crunchy chewiness
  • Most of all, even when it fails, it's still delicious and good friends will lie and agree with you
Ingredients

Meringue
  • 6 egg whites (save the yolks for the creme patisserie!)
  • 300g cater sugar
  • 1 tsp white vinegar
  • 1 cup pecans, finely processed
  • Seasonal Berries (preferably not frozen as they will be too wet)
  • Icing sugar to dust
Creme Patisserie
  • 300ml full fat milk
  • 30g unsalted good quality butter
  • pinch of salt
  • 60g unrefined caster sugar
  • 30g plain flour
  • 3 egg yolks
  • 1 tsp vanilla extract
Method

Meringue
  1. Preheat the oven to 140ÂșC. Line 3 baking sheets with baking paper and trace the bottom of a loaf tin onto each
  2. Beat the egg whites until there are stiff peaks. Then slowly add the sugar a spoonful at a time, make sure to beat well after each addition. 
  3. Gently fold through the vinegar, vanilla and pecans. Making sure not to knock the air out of the eggs as you go.
  4. Divide the mix between the 3 baking trays. Stack each meringue thick to get it as chewy as possible
  5. Bake for 1 hour, then turn the oven off and leave the meringues in it to cool.
Creme Patisserie
  1. Beat the egg yolks and caster sugar until pale and thick ribbons form when the beaters are lifted
  2. Seive the flour over the top and mix until smooth
  3. Put the milk, butter, salt and vanilla in a medium sized, non-stick saucepan.
  4. Bring the milk to the boil. Once boiling, remove from the heat and pour a ladle full over the eggs. Stir quickly until smooth. Repeat until about half of the milk has been incorporated
  5. Pur the egg and milk mix into the saucepan with the remaining milk.
  6. Bring to the boil then simmer on a low heat for 3 minutes
  7. Cover the surface with gladwrap or baking paper so that a skin doesn't form
Assembly
  1. To assemble, place one of the meringues on a flat plate and spread with a third of the creme patissiere. 
  2. Scatter a layer of berries, top with another of the meringues and repeat


Enjoy!

Glutton

Saturday, 27 April 2013

Banana Bread

In Canberra, everyone believes that ANZAC day is the unofficial start of winter and the weather definitely agrees. It's time to start making soups and curries and casseroles - all those hearty, warming foods. Unfortunately most recipes are normally designed for 4 and I only cook for 1 which means a lot of leftovers and the need for a lot of freezer space!

As I mentioned in a previous post, I freeze bananas (and anything else that will survive) rather than wasting it. However bananas seem to take up most of my freezer space, so I am on a clearing out spree to make room for all my winter warmers. The latest banana using addition is this delicious banana bread from 101 Cookbooks.

Thursday, 25 April 2013

Banana Pikelets

I'm not what you would call a morning person. If given the choice between 10 more minutes in bed or getting up eating a banana and coffee before heading to work; bed will win every time. What this does mean though, is that the end of each week I have several overripe bananas to do something with. A great tip I learnt is that you can freeze bananas whole in their own skin (low effort solution for the win!).

Recently while scrummaging through the freezer I discovered about a dozen bananas taking up precious space so decided to go on a banana baking spree (apologies in advance if you are looking for a banana free recipe!). 

This is the first of several banana recipes; a easy, quick breakfast that can be made in advance or while hovering in the kitchen with a mug of coffee.


Thursday, 7 February 2013

Jam Thumbprint Cookies


I know we're well past Christmas, but I didn't get a chance before I went on holidays to share one of my family's biggest traditions. In an attempt to cut down on the rampant Christmas spending that haunted us every year, we switched to Kris Kringle a few years ago - meaning that the adults only got one gift each (the kids still get a pile taller than themselves). But there is still that niggle, that little thing in all of our minds (by which I mean the female side of the family) saying that you still need to give everyone something even if you aren't allowed to buy anything. So, what to do you do? Make jam!


Monday, 3 September 2012

Upside-down Blood Orange Cake

I am not a huge fan of oranges; all that pith in a glass of juice or if eating it whole I invariably buy that one sour orange on offer. However, blood oranges are a completely different story. I find they are usually quite tart which makes them perfect for cooking as you can add a bit of sugar for balance.

Having some friends over for a weeknight dinner, and as always, my best laid plans of preparing everything the day before had not been realised so I was scouring my cookbooks for a stunning, yet straightforward recipe. I came across Donna Hay's sticky orange and vanilla upside-down cake in her Seasons book. Having made a variant of the cake before, I knew it would work, but without Donna's fantastic team of food stylists there was no chance of my vanilla bean looking that artful. Instead I decided to distract my guests with the novelty of a deep rosy, blood orange topping.

Thursday, 26 July 2012

Frangipane and Fig Jam Tartlets

As the end of winter approaches and spring is beginning – so does the time for baking (at least in my house).

Following on from the delicious Fig Jam I made in March (see the Fig-tastic post), I decided to do a bit of early spring cleaning of my pantry; aka finding an excuse to bake delicious things (not that one ever really needs an excuse).

Using a Jamie Oliver recipe that a dear friend has adapted (thank you so much darling!) I made Frangipane and Fig Jam Tartlets. You could easily substitue any other high quality homemade jam/jelly.

Ingredients

  • 6 small shortcrust pastry cases (pre-bought is fine)
  • 1 large egg
  • 100g almond meal
  • 100g softened butter
  • 90g caster sugar
  • ½ orange, zested
  • 1 tablespoon vanilla bean paste (can substitute with essence)
  • 170g good-quality fig jam

Method

  1. Preheat oven to 190 degrees Celsius (I have a fan forced oven) 
  2. Put the 6 pastry cases on a baking tray (lined with foil or wax paper)
  3. To make the frangipane mixture - crack the egg into a mixing bowl and add the almond meal,  butter and caster sugar.
  4. Grate over the zest of ½ an orange and add the vanilla bean paste
  5. Mix together until combined
  6. Spoon  2 teaspoons of jam into each pastry base
  7. Top off with frangipane mixture (you can add a drop of jam on top to caramelize if desired)
  8. Bake for 15 to18 minutes, until top of tartlets are light golden brown.

Notes

Ensure your oven is hot enough and has a consistent temperature (essential for baking) so that your tarts cook properly and within the suggested time frame (an in-oven thermometer is a great help for this).

If the tartlets don’t turn a light golden brown within 18min, you can continue to cook until 25min.
Don't be concerned if while cooling the center of the tartlets sinks - this is normal.

They will keep for up to five days in a closed container.

Serve warm or chilled - delicious anytime, anywhere.

Lush

Tuesday, 17 July 2012

Ice-cream Cookie Cups

Nothing better than turning on the heater to max, and eating ice-cream and cookies (even if it is winter). And what better way to enjoy both classic desserts than together.

YES – A cookie made into an ice-cream cup.

This recipe is inspired by the Family Fun Recipe and a friend of mine who made them for dinner one night when I was a guest.

Ingredients

  • 1/2 cup butter 
  • 2/3 cup sugar 
  • 1 egg
  • 1/2 teaspoon vanilla extract
  • 1/2 teaspoon salt
  • 1/4 teaspoon baking powder
  • 1 1/2 cups flour
  • 1/4 cup miniature semisweet chocolate chips

Cookie Dough Method

  1. Mix the butter, and sugar in a large bowl (electric mixer is best)
  2. Add egg and vanilla extract, mix until combined.
  3. Sift in the salt, baking powder, and flour while mixing.
  4. Stir in the chocolate chips.
  5. Half mix, shape into two flat discs, and wrap it in plastic. (Chill the dough in the refrigerator for at least 2 hours)

Cookie Cup Method

  1. Heat the oven to 180 degree Celsius.
  2. Using two 12 cup muffin tins – turn them upside down, and use the bottom side to shape cups.
  3. Cover only half the bottoms with squares of aluminium foil (use every other cup so there's some space between them).
  4. Grease the foil with a bit of butter
  5. Unwrap 1 disk of dough, place it between 2 sheets of baking paper, and roll it out to a 1/3 cm thickness.
  6. Cut out 10 cm diameter circles of dough and place each one over a cup bottom, smoothing out any cracks (do not push out or make them thinner).
  7. Repeat with the other disk, rerolling and reusing any scraps.
  8. Bake the cookie cups for 10 to 12 minutes or until light brown.
  9. Let them cool for 10 minutes, and then remove the foil and cookies together from the muffin pan.
  10. Peel off the foil and let the cups cool completely on a rack.

Makes 10 cups.

Then simply fill each cookie cup with a scoop of ice cream and enjoy!

Notes

I know what you are thinking – because I thought it too.
“All this rolling, refrigerating the dough – I could so just wing it instead”


Well – I wouldn’t – I tried to take shortcuts the first time and it was a disaster – I ended up with an upside down mass of cookie dough – not a single cup.

However – if this happens to you, you can salvage it in a way.
  1. While the dough is still hot, gather it all and push into the bottom of a round cake tin.
  2. Then when this cools, you have the perfect base for a free-form ice-cream cake
  3. To make – simply top with ice-cream, sprinkle with chocolate flake and re-freeze (see the picture below of mine)

Lush

Tuesday, 19 June 2012

Healthy Nut Bars


After a couple of Birthday dinner celebrations and a long weekend of eating (and drinking) I have decided that I need to try to eat a bit healthier for a while. My biggest challenge is snacking on chocolate and chips, so I went on the hunt for a homemade muesli bar recipe (minus the sugar). I found a fantastic blog by a couple in Sweden who write about their healthy vegetarian diet. Although I am not vegetarian (as you would have guessed from the Lamb Blog), I don’t eat meat regularly and am glad to have found a site with plenty of salads and soups!


On Green Kitchen Stories these are called Sticky Nut Bars, but as mine didn’t turn out sticky I am just going to call them Healthy Nut Bars. I have changed the recipe from the original, based on what I had in the pantry. Let me know what flavours you try!

Ingredients
10 fresh dates (try substituting 15 dried dates soaked in water for an hour)
2 tbsp water
2/3 cup organic peanut butter
1/2 cup almonds
1/2 cup cashew nuts
1/2 cup dried apricots
1/2 tsp salt

Method
1. Line a lamington pan with baking paper
2. In a saucepan, combine dates, water and peanut butter over a low heat
3. Add remaining ingredients and stir to combine. The mixture should be quite tacky. Add more nuts if the mixture is too moist or some more water if it is too dry
4. Pour the mixture in the pan, pressing down to an even height
5. Refrigerate for half an hour, before cutting into squares before serving.
6. Keep in an airtight container in the fridge

Glutton

Tuesday, 22 May 2012

Hot Cross Buns

Over the Easter break, we were lucky enough to go away with a few close friends, one of whom was kind enough to share his Hot Cross Bun Recipe.
 One of my favourite parts of Easter is enjoying hot cross buns for breakfast or an afternoon snack. I usually stock up on a few packs and freeze them at the end of Easter so I can enjoy them for a couple of weeks after the Easter weekend, but a year or so ago I decided to try my hand at making my own so I could enjoy them as long as I want. I was surprised to find they're not quite as difficult to make as I was expecting.

Following is the recipe from my most recent batch. I find that with every making it evolves slightly, with additional spices and fruit or slightly different ratios. Don't be afraid to experiment yourself, and post back any suggestions in the comments!

Ingredients:


For the buns
1/3 cup castor sugar
2 x 8g sachets dry yeast
1 1/2 cups warm milk (about 45C is ideal for yeast)
600g plain flour
a pinch of salt
2 tsp ground nutmeg
4 tsp ground cinnamon
2 tsp mixed spice
60g butter, chopped
1 egg, lightly beaten
2/3 cup currants
1 1/2 cup sultanas
Freshly grated orange zest (to taste)

For the cross paste
1/2 cup plain flour
2 tsp castor sugar
water

For the glaze
1 tbsp water
1 tsp gelatin powder
1 tbsp castor sugarMethod:

Method:

For the buns

Combine sugar, yeast and milk in a bowl, stir until sugar is almost dissolved, and rest covered in a warm place for about 10 minutes or until frothy. I find the yeast mixture is normally ready by the time I've completed the next two steps.

Lightly coat the currants and sultanas in flour (this isn't critical, but makes it easier to get the fruit to spread evenly through your dough).

Sift flour, salt and spices into a large bowl (a 5 litre ice cream bucket is quite handy because the mixture ends up quite large) and rub butter into flour mixture with fingertips. The butter and flour should be well combined and an even texture.

Stir in yeast mixture, egg, peel, currants and sultanas until well combined.

Cover and rest in a warm place for about 45 minutes or until mixture has doubled in size.

Pre-heat oven to 220C.

Turn dough onto a lightly floured surface and knead for about 5 minutes until smooth and elastic. You might need to sprinkle more flour over the dough and surface as you go, depending how sticky it is (a tea strainer is useful for this). This is a helpful video if you haven't kneaded before.

Divide dough into 16 even pieces and roll into balls. To keep them an even size, it helps to halve the dough, then continuing halving three more times until you have 16 pieces.

Place balls on a baking tray lined with baking paper. The balls should be about 1 cm apart as they support each other when they rise. Rest covered for 10-15 minutes to allow the balls to rise while you make the cross paste.

For the cross paste

While the buns are rising, put together the mixture for the cross paste. Combine the dry ingredients in a small bowl and mix with water until you have a smooth paste consistency. The paste should be reasonably thick so the crosses don't run down the side of the buns.

Using a piping bag fitted with a small plain nozzle (or a snaplock bag with the corner snipped off), pipe crosses onto the buns.

Bake for 20 minutes or until browned.

For the glaze

Dissolve gelatin in a small amount of water (see this link for a lump free way of dissolving gelatin - patience is a key ingredient to avoid lumps). Add castor sugar and a small amount of boiling water. Stir to dissolve.

While hot, brush buns with warm glaze then allow to cool on rack.

Enjoy toasted and slathered with butter!

DJ

Monday, 14 May 2012

Chocolate Flourless Torte

I am always on the look out for recipes of delicious, quick and easy desserts.

When preparing a dinner party for friends I usually end up underestimating the preparation time for my first two courses. Something to do with guests arriving and my desire to gossip rather than chop. Having a big open-plan kitchen only encourages this! Luckily, I know that the day will be saved by some deliciousness that I already have baking in the oven.

This recipe is pulled from one of my multitudes of Delicious magazines spread over the coffee table (although as I have now swapped to an SBS Feast Magazine subscription there is a bit more variety around the house). Valli Little calls this a torte, but to me it is more of a flourless chocolate cake.


NOTE: this is not something to leave on the bench unattended. My housemates managed to polish this off in less than a day!

Ingredients


  • 210g roasted pecans (cooled if you roast them)
  • 180g dark chocolate, chopped
  • 1 cup caster sugar
  • 4 eggs, separated
  • 220g butter, melted
  • 1 1/2tsp vanilla extract

Method


  1. Preheat the over to 170 Celsius and line a medium sized spring form tin. If you want a perfect edge to your cake then grease the pan and dust with flour.
  2. Use a food processor to grind pecans and chocolate until finely ground.
  3. Beat egg yolks with sugar until thick and pale. Slowly add in butter and vanilla.
  4. Stir in pecan-chocolate mixture.
  5. Beat egg whites until firm peaks.
  6. Whisk a quarter of the egg whites into the chocolate mixture then gently fold-in remaining until combined.
  7. Pour into pan and gently shake so that it settles. Make sure not to knock it too hard or you will lose all the air from the egg whites!
  8. Bake for 50mins; until the edges start to pull away from the sides of the pan.
  9. Cool in the pan. Don't be worried when it collapses - its meant to be quite a dense cake.
  10. Dust with cocoa or icing sugar to serve warm with cream.

Glutton

Monday, 16 April 2012

Easter Time

Finally what you have all been waiting for, Lush’s first recipe blog post.

Easter is one of my favourite times of the year – the joy of the Easter Egg Hunt, eating chocolate (especially if you gave it up for lent), and the public holidays in which to spend some much needed time in the kitchen cooking for friends and loved ones.

This year I decided to venture away from the traditional Easter delights, and incorporate the Easter Egg in a more inventive dessert – and voilĂ  – the Easter Egg Cupcake is born.


To start – use your favorite chocolate cupcake recipe and icing recipe, I recommend using:

CUPCAKES:

Raspberri Cupcakes adaptation of Nigella Lawson's Old Fashioned Chocolate Cake (since they already converted a great cake recipe into cupcakes).

Ingredients:

  • 100g plain flour
  • 100g caster sugar
  • 1/2 tsp baking powder
  • 1/4 tsp bicarb soda
  • 20g Dutch process cocoa powder
  • 85g unsalted butter, softened
  • 75g sour cream
  • 1 large egg
  • 1 tsp vanilla extract 


Method:  

Sourced from Raspberri Cupcakes website


  1. Preheat oven to 180 degrees C.
  2. Place flour, caster sugar, baking powder, bicarb soda, cocoa, butter, sour cream, egg and vanilla (aka all ingredients) into a food processor .
  3. Pulse until all the ingredients come together and you have a smooth, thick batter
  4. (If you are using a hand mixer instead: just mix the flour, sugar and leavening agents in a large bowl and beat in the soft butter until you have a combined and creamy mixture. Now whisk together the cocoa, sour cream, vanilla and eggs and beat this into your bowl of mixture)
  5. Spoon the batter into a lined mini muffin tray (about 3/4 full) and bake for about 10 minutes or until a skewer comes out clean and the cake springs back slightly under your finger when you press it gently.
  6. Remove from the tray and cool completely on a wire rack.

Alternatively Raspberri Cupcakes devils foodcake cupcakes – adapted from David Lebovitz's Devil's Food Cake recipe also works a treat.

ICING:

I used Nigella Lawson's recommended icing recipe from her Old Fashioned Chocolate Cake recipe, I mean why reinvent the wheel when someone has already perfected it.

Ingredients:

  • 75g unsalted butter
  • 175g best quality dark chocolate, broken into small pieces
  • 300g icing sugar
  • 1 tablespoon golden syrup
  • 125ml sour cream
  • 1 teaspoon real vanilla extract

Method:   

Sourced from:Nigella Lawson's website

  1. Take everything out of the fridge so that all the ingredients can come to room temperature.
  2. To make this icing, melt the butter and chocolate in a good-sized bowl either in the microwave or suspended over a pan of simmering water. Go slowly either way: you don't want any burning or seizing.
  3. While the chocolate and butter are cooling a little, sieve the icing sugar into another bowl. Or, easier still, put the icing sugar into the food processor and blitz. (to remove the lumps)
  4. Add the golden syrup to the cooled chocolate mixture, followed by the sour cream and vanilla until all combined
  5. Then whisk in the sieved icing sugar. Or just pour this mixture down the funnel of the food processor on to the icing sugar, with the motor running.
  6. You may need to add a little boiling water - say a teaspoon or so - or indeed some more icing sugar: it depends on whether you need the icing to be runnier or thicker; or indeed it may be right as it is. It should be liquid enough to coat easily, but thick enough not to drip off.

Decorating:


Ingredients:


  • 4 x Cadbury Flakes
  • 1.5 dozen Mini Easter Eggs – various colour wrapping


Method: 

  • Once the cupcakes have cooled, use a pipping bag (alternatively a ziplock with the corner cut off works a treat) to apply the icing (room temp) on top – about one cm thick evenly across the top (don’t worry if it is messy).
  • Next – break up the flakes into 3-4 cm pieces, and half the thickness, and building in a donut pattern around the top of the cupcake a bird nest (pushing them into the icing to hold in place)
  • Last – place three Easter Eggs in the center of the “flake nest” to create the final Easter touch (alternatively you can use Cadbury mini eggs for a softer pastel colour look).

Serve with Coffee and forks.

Lush

Thursday, 29 March 2012

Crumpets

There is nothing better than waking up to a fresh cup of coffee (long black thanks) and enjoying a fresh, warm crumpet slathered with homemade jam. Now, you might not be aware of this, but you can actually make crumpets - scandalous I know - especially on a food blog. However they do take at least an hour to make so if you're planning on breakfast in bed, I'd suggest making these in advance and stocking the freezer.
I was first inspired to make crumpets by my favourite blog Trotski & Ash, but was put off by the 3 hour preparation time. Luckily, last weekend Lush & I had the offer of a holiday house on the Mornington Peninsula that came with it's own Thermomix (TM). For those of you who haven't heard of this ridiculously expensive wonder machine (AU$2000!); it is a kitchen in itself. I won't go on a sales pitch now, but suffice to say that once I have my own house, with more than one powerpoint in the kitchen, I will be investing in a TM - possibly adding it into a sizable mortgage.


Back to the crumpets: TM ready to go I followed the instructions of Thermomixer and closer to 2 hours later had my (and 3 other peoples) breakfasts on the table. A TM isn't necessary for this recipe other than to save you some muscle work so I've put the instructions for both below.

Ingredients:
  • 375g plain flour
  • 1/2 tsp caster sugar
  • 1 tsp dried yeast
  • 300ml warm milk
  • 200ml warm water
  • 1 egg
  • 1/2 tsp salt
  • 1/2 tsp bicarb soda

Method:

Mix 1 tbsp of the flour, all the sugar and yeast with 100ml of the milk until combined. It should become frothy. If using a TM, mix for 3 minutes at 37°C on speed 2.

Add remaining flour (roughly 350g), 200ml milk, water, egg and salt and combine [10 seconds on speed 7].

You should have quite a thick batter, add more warm water if needed and mix the mixture again. Or for 8 minutes at 37°C on speed 1.

Leave the mixture to prove (rise) for at least 1 hour; the surface should be covered in bubbles.

Dissolve the the bicarb soda in a few tsps of warm water and add to the mixture. Beat vigorously for a few minutes to whip as much air in as possible. For the TM gradually increase the speed to beat the mixture for 2 minutes at speed 5. Leave for another 30mins or so.

If like my mixture yours is a bit gluey and without bubbles, add another glug of warm water and beat just before using.

I prefer my crumpets free-form, but if you like uniformity then oil some egg rings and place in a hot oiled frypan.

On a medium to low heat, cook batter for 5 -10 mins, or until the surface is dry and is full of holes. Remember that the mixture will rise so don't fill your rings too much! We ended up cutting ours in half.

For a bit of crunch briefly cook the top as well.

Serve warm with butter and your favourite topping (homemade apricot jam is mine!)

Freeze any leftover and toast when you want to enjoy them.


Glutton

Sunday, 4 March 2012

Fig-tastic


I am always sad to see summer start to fade away, but it also marks the start of fig season. Figs are an amazingly delicious fruit, but unfortunately they can be incredibly expensive. A few years back I discovered that a friend has a giant fig tree that, at this time of year, is laden with more fruit than he (and his family) can consume. Enter food-obsessed-friend desperate to take as many figs off his hands as possible. Saturday afternoon was spent braving the constant rain, clambering under the tree looking for ripe figs that the rosellas were yet to get to. Figs don’t ripen off the tree so you need to make sure that you only pick those with a bit of give. These ones also stay green when they ripen, rather than those that turn purple. Also watch out for the sap it can be quite itchy!

This week I have two recipes to try out; the first is a very simple starter and the second is inspired by the fantastic sounding galette on the delicious days blog.

Goats Cheese Stuffed Figs

Ingredients
  • Figs (bigger are easier to stuff)
  • Soft goats cheese (we used a chĂšvre, but a curd would be easier to stuff)
  • Proscuitto (thinly sliced)
  • Few sprigs fresh oregano or rosemary
  • 3 tbsp Honey

This is not really a recipe with quantities, it really depends on how many figs you have. For each fig you need approximately ½ tbsp of goats cheese, and 1 slice of prosciutto.
Heat the grill section of your oven.
Slice the top of each fig into quarters, and push the goats cheese into the cavity.
Wrap each fig in prosciutto; we used a skewer to make the figs easier to handle, but this isn’t really necessary.
Place the figs on a baking tray, sprinkle with the fresh oregano leaves and drizzle honey over the top.

Grill the figs for 5-10mins until the top of the prosciutto is crispy.


Fig Galette


Ingredients
  • Galette Dough:
  • 175g plain flour
  • 1 tbsp caster sugar
  • ¼ tsp fine sea salt
  • 100g cold butter diced
  • 1 tbsp sour cream
  • 50ml ice-cold water
  • Pinch of salt

Fruit Filling:
  • 400g figs (or any other fruit) thickly sliced (we did sixth’s)
  • 1 tbsp brown sugar
  • 1 tbsp butter

Method
If you have a food processor, simply add your flour, caster sugar, butter and salt to the bowl and pulse until the mixture resembles coarse bread crumbs.
If you don’t have a food processor, grate the cold butter into a bowl and then quickly rub it using your finger tips until it reaches the coarse breadcrumbs stage.
Add the sour cream and water slowly until the mixture comes together. You may not require all the liquid – if it gets too sticky just add a bit more flour. Roll into a ball, cover in glad wrap and cool in the fridge for an hour.
After an hour, pre-heat your oven to 180 degrees, roll-out the dough into a circle that is 3mm thick.
Scatter your sliced fruit leaving a 5cm gap around the edges. Sprinkle the brown sugar over the top and dollop the butter on top.
Bake for 30mins or until the pasty starts to turn golden and the fruit is soft.
Serve with cream or you can try King Island vanilla bean yoghurt to cut through the sweetness.
Happy Eating!
Glutton